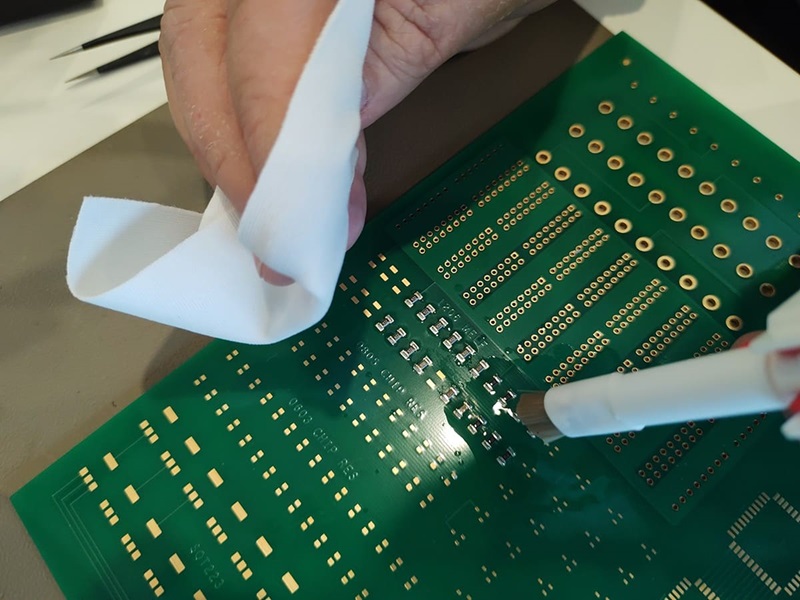
Circuit boards are essential to how most electronic and technological products work. Over time, using the device often causes dirt and debris to build up on these circuit boards, which can affect how they work in the long term. So, it's important to regularly clean and maintain circuit boards to avoid potential risks and problems.

clean pcb boards
Why do we need to clean PCB boards?
1. Enhance the aesthetic appeal of printed circuit boards
In this industry, the appearance of PCBs is crucial, so manufacturers must pay close attention to it. One way to make these PCBs is to clean them the right way. PCBs that are dirty and greasy are not only unattractive, but they are also more likely to have short circuits and to perform poorly over time.
2. Enhance the reliability of printed circuit boards
For sensitive and high-frequency devices, it's better to have clean and well-maintained PCBs. It is important to clean the PCB boards to ensure that it works properly under stress. This is because, over time, dirt and debris can build up on PCBs, which can lead to short circuits and technical failures.
3. Control corrosion of PCB components
The best part about PCB cleaning is that it stops sensitive PCB parts from rusting and corroding over time. Proper cleaning can easily prevent such issues and remove moisture that may cause corrosion in these components.
4. Avoiding Adhesion Issues
If we don't handle flux on PCBs properly, problems may occur. This means that flux might stick and damage the coatings and PCB layers. We can solve problems with adhesion by cleaning the PCB boards.
5. Preventing dendritic growth
Sometimes, workers may not notice ionic particles (flux residue) left behind. Over time, these particles react with moisture and form dendrites when current flows through them. This causes the PCB's electronic performance to get worse. These dendrite chains are the main reason for the leakage and other technical problems.
What accumulates on circuit boards?
Maintaining clean PCB boards is vital to prevent failures. Onboard fans sucking in dust, combined with leftover soldering flux, spilled liquids, or broken part fragments, create contamination risks. Dust and flux absorb airborne moisture, causing corrosion. Crucially, improper cleaning leaves residues that enable dendrite growth – metallic filaments forming due to electrolytic reactions triggered by moisture or contaminants. These dendrites can create unintended conductive paths, leading to leakage and short circuits. Environmental factors like factory dust or hotspots accelerate this. Ensuring truly clean PCB boards through proper post-assembly washing and regular maintenance is essential to mitigate corrosion, prevent dendrite formation, and ensure long-term reliability.
PCB Cleaning Tools
PCB cleaning tools are very specialized and are used to remove dirt and other things from circuit boards and prevent static electricity from entering the circuit board. These tools include:
-Wrist straps that prevent static electricity These are important for protecting the PCB from electrostatic discharge (ESD). ESD can damage the PCB.
-Compressed air supply: It blows away dust without touching the PCB. However, make sure you use a compressed air canister that is free of moisture. This will help you avoid contaminating the air during the cleaning process.
-Anti-static brushes: These brushes can remove contaminants without causing ESD damage because of their special bristles.
-Cotton swabs: I used to apply PCB boards cleaning solution.
-Tweezers: It is used to remove large, stubborn contaminants.
-Lint-free cloth: After using it, I would wipe away any leftover electronic cleaning solvents.
PCB Cleaning Steps
1. Disconnect the device from the power supply. You may come into direct contact with conductive materials, so eliminate all electric shock hazards first.
2. Take apart the electronic device and remove the PCB to be cleaned.
3. Look at the PCB to see what kind of contaminants are on it and where there is a lot of buildup.
4. Use compressed air to blow away dust and debris. Keep the air source at a safe distance from the PCB and use short bursts of air to avoid damaging the PCB.
5. Gently clean the PCB boards with an anti-static brush to remove stubborn dirt and other substances, such as corrosion and flux, which require PCB cleaning solution.
6.Use electronic cleaner or flux remover as needed. You can use a lint-free cloth or cotton swab with these products, or you can spray them directly using the nozzle on the can.
7. Gently clean the contaminated areas with a cotton swab or cloth to avoid damaging the components.
8. You can spray the cleaner directly from the pressurized can. This may create enough agitation to avoid the need for wiping.
9. Rinse the circuit board with a solvent cleaner or deionized water. Again, use gentle motions and apply the solution sparingly.
10. Put the PCB in an area that has a lot of air movement to dry. You can use a clean, lint-free cloth to gently dry the circuit board to speed up the drying process.
11. Once the PCB is completely dry, put it back together and reconnect the power supply.