A Trustworthy PCB and Electronic Manufacturing Enterprise! Contact Us


For electronic hobbyists, inventors, and hardware makers, there comes a defining moment when building circuits on temporary plastic breadboards or messy stripboards is no longer sufficient. When your projects grow to involve complex microcontrollers or sensitive analog components, loose jumper wires can introduce unpredictable electrical noise and mechanical failures. Stepping up your prototyping game by making PCB boards at home is the perfect way to build rugged, permanent modules over a single weekend. This hands-on process allows you to immediately test out a new schematic design without waiting days or weeks for an overseas fabrication house to ship a sample. By mastering the fundamentals of chemical etching and artwork transfer in your workshop, you can fast-track your hardware education and gain a deep, practical understanding of how physical circuits are manufactured.

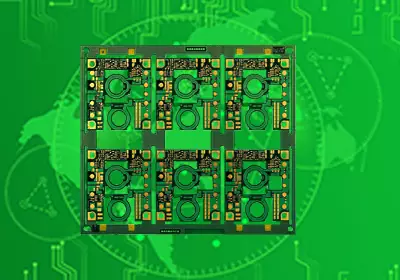
making PCB boards at home
Essential Tools and Safety Equipment Preparation
Before setting up your workspace, you must gather a few specialized materials and establish a secure, well-ventilated laboratory area. The foundation of your project will be a single-sided copper-clad laminate sheet, usually featuring a rigid FR4 fiberglass or composite paper base. To transfer your computer layout onto this metal sheet, you will need a standard laser printer and high-gloss photo paper or specialized yellow toner transfer sheets.
Because the process requires aggressive chemical handling to dissolve solid metal, safety cannot be compromised. You must secure heavy-duty nitrile gloves, chemical splash goggles, and an apron. The etching solution can be prepared using traditional Ferric Chloride (FeCl3) or a highly effective homemade mixture of standard Hydrogen Peroxide (H2O2) and household Muriatic Acid (HCl). Always conduct your chemical work outdoors or next to a running exhaust fan, as the reactions release irritating vapors that should never be inhaled.
The Art of Toner Transfer and Pattern Masking
The entire accuracy of your copper traces relies on creating a perfect chemical barrier over the copper foil. When you are making PCB boards at home, the most accessible and reliable industrial alternative is the toner transfer method. You must print your mirrored PCB layout file using a laser printer set to its maximum toner density. This step is critical because laser printer toner is actually a plastic-based resin that melts under heat, whereas standard inkjet printer ink will simply wash away in the chemical bath.
First, scrub the raw copper board with fine steel wool and isopropyl alcohol until the surface is completely shiny and free of finger oils. Place your printed design face down on the clean copper shield. Using a standard household clothes iron set to high heat with zero steam, press down firmly on the paper for approximately five minutes. The heat liquifies the plastic toner, bonding it permanently to the metal plate. Soak the hot board in cold water for ten minutes, allowing the paper to soften so you can gently peel it away, leaving sharp black plastic lines masking your intended circuit layout.
Chemical Etching and Removing Waste Copper
With your circuit tracks successfully masked by the protective toner layers, the board is now ready to enter the chemical etching bath. If you are using the hydrogen peroxide and acid mixture, pour the chemicals into a shallow plastic or glass container, remembering to always add the acid to the water-based peroxide, never the reverse. Submerge the board face up into the liquid.
As the chemical reaction ignites, you will notice the clear solution turn a deep green color as it begins dissolving the exposed unprotected metal. To maintain a fast, uniform reaction rate and prevent the liquid from pooling statically, gently rock the plastic tray back and forth. Within ten to fifteen minutes, all the excess unwanted copper will completely vanish, leaving behind the exposed translucent fiberglass base. Immediately remove the board with plastic tongs and submerge it in a neutralizing bath of clean water and baking soda to halt any further chemical erosion of your precious traces.
Drilling and Post Processing Challenges Compared to Factory Boards
Once the board is rinsed and dried, wipe away the protective black toner using a rag soaked in acetone, revealing the pristine, bright copper traces underneath. The next physical hurdle when making PCB boards at home is drilling the component holes. Unlike automated factory CNC machines, DIY creators must use a high-speed mini rotary tool mounted on a vertical drill press stand.
Drilling hundreds of microscopic 0.8mm holes manually requires immense patience and a steady hand, as carbide bits break easily under minimal lateral pressure. Furthermore, home-etched boards lack Plated Through Holes (PTH), meaning no copper is lining inside the holes to connect the top and bottom layers automatically. If you attempt a double-sided layout at home, you will have to manually solder component pins on both sides of the board. Additionally, home environments rarely allow for the application of a professional liquid photoimageable solder mask or white silkscreen markings, making the final asset highly vulnerable to oxidation if it is not immediately sprayed with a protective clear lacquer coating.
Conclusion
Tearing down the barrier between a digital schematic and a functioning physical asset is a thrilling milestone for any hardware innovator. While the DIY chemical method cannot match the ultra-fine trace pitches, multi-layer internal capabilities, and clean green solder masks provided by commercial factories, it remains an incredibly powerful tool for rapid prototyping and classroom education. Engaging in the process of making PCB boards at home teaches you how to design wider, more forgiving traces, plan better ground pours, and appreciate the strict mechanical tolerances required in industrial manufacturing. By utilizing simple household tools alongside affordable chemical solutions, you can successfully bypass production lead times, turning your creative circuit ideas into rugged, working realities in just a matter of hours.