A Trustworthy PCB and Electronic Manufacturing Enterprise! Contact Us


Building your own custom gadgets on a workbench is one of the most rewarding parts of the DIY electronics hobby. Moving a circuit from a temporary plastic breadboard to a permanent soldered board gives your project durability and a clean look. However, many beginners heat up their soldering iron, drop components into place, and start soldering right away—only to run into solder that refuses to stick, dull joints, or burnt copper traces. Understanding how to prepare pcb board substrates correctly on your DIY workbench removes all the frustration, guaranteeing shiny, reliable solder joints and a smooth building experience from start to finish.
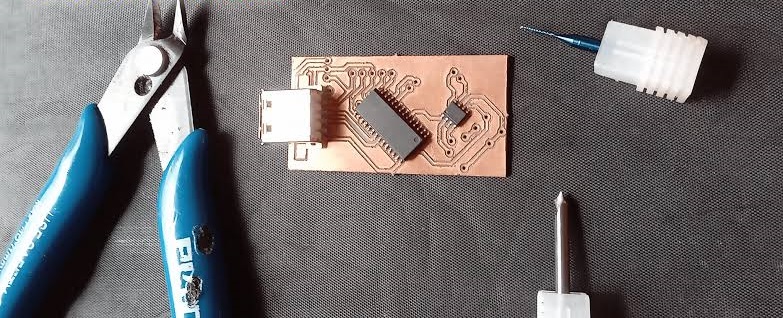
how to prepare pcb board
Workbench Surface Cleaning and Scrubbing
The first and most important step on your workbench is giving your bare copper board a thorough deep clean. Even brand-new copper laminates acquire invisible layers of oxidation, storage dust, and skin oils from manual handling. If you try soldering onto a dirty board, the copper repels molten solder, resulting in frustrating cold joints or solder blobs that bridge neighboring holes.
To get your board solder-ready, pour a small amount of high-purity isopropyl alcohol (90% or higher) onto the board and scrub it gently with a soft lint-free cloth or a piece of fine steel wool. Lightly buffing the copper pads removes the dark tarnish, revealing a bright, shiny copper layer beneath. After scrubbing, wipe away all leftover dust with alcohol, and handle the board only by its outer edges so your fingers do not leave fresh oils behind.
Component Sorting and Workbench Setup
Good organization on your workbench makes manual assembly much faster and reduces silly wiring mistakes. Learning how to prepare pcb board builds like an experienced maker means sorting your parts before heating your iron.
---Sort by Physical Height: Group your components by size. Always plan to solder the shortest parts first (such as low-profile resistors, signal diodes, and ceramic disc capacitors), moving on to medium components (IC sockets and transistors), and finishing with tall items (electrolytic capacitors, relays, and screw terminals).
---Prepare Your Hand Tools: Keep a rosin flux pen, a damp sponge, thin 63/37 solder wire, and sharp flush cutters right next to your iron holder. Applying a thin coat of liquid flux directly to the copper pads right before soldering helps heat transfer instantly and keeps solder flowing smoothly.
Pin Inspection and Micro-Oxidation Removal
Just as your raw copper board accumulates oxidation over time, the leads of your electronic components can also oxidize while sitting in storage drawers. Dull, gray component leads are notoriously difficult to solder, often causing loose physical connections inside the hole.
Part of knowing how to prepare pcb board assemblies involves inspecting component pins before putting them through the holes. If a lead looks dull or tarnished, scrape it gently with a hobby knife or rub it with fine sandpaper until bright metal shows through. For hard-to-solder pins like thick transformer leads or vintage components, pre-tinning them—applying a light coat of fresh solder to the pin with your iron before placing it into the board—ensures an instant, solid bond once it meets the pad.
Continuity Testing and Dry-Fitting Components
Before making any permanent solder joints, do a quick "dry fit" by inserting your main chips and connectors into the board without soldering them. This simple dry run lets you double-check component spacing, confirm pin orientations (such as diode polarity or IC notch direction), and ensure your project fits neatly inside its project box or plastic enclosure.
Furthermore, double-check how to prepare pcb board power paths before starting. Take your digital multimeter, set it to the continuity buzzer mode, and quickly test the copper tracks between your positive power rail (VCC) and ground (GND). Confirming that there are no factory defects or accidental copper shorts on your blank board before installing components prevents burnt microchips when you power up your project for the first time.
Conclusion
Taking a few extra minutes to prep your materials on the workbench makes a world of difference in DIY hardware building. Skipping basic cleaning and component prep leads to messy solder joints, weak connections, and wasted troubleshooting hours later on. By scrubbing your copper laminate clean, organizing components by height, removing lead oxidation, and dry-fitting your layout, you can master how to prepare pcb board projects like a seasoned maker. Investing time in neat preparation guarantees that your handmade electronic creations work reliably, look professional, and stand the test of time.