A Trustworthy PCB and Electronic Manufacturing Enterprise! Contact Us


Whether you are running a professional electronics repair workshop, refurbishing vintage computer hardware, or building custom circuit boards on your home workbench, achieving absolute cleanliness is the secret to long-term hardware reliability. During the soldering process, corrosive flux residues, greasy fingerprints, and microscopic dust particles inevitably accumulate across the copper traces and component pins. Leaving these conductive contaminants on your board can lead to electrical leakage, slow corrosion, and intermittent short circuits over time. When manual scrubbing with a toothbrush and isopropyl alcohol fails to reach beneath dense microchips, investing in a high-performance ultrasonic circuit board cleaner provides the ultimate professional solution to restore dirty hardware to factory-fresh condition.
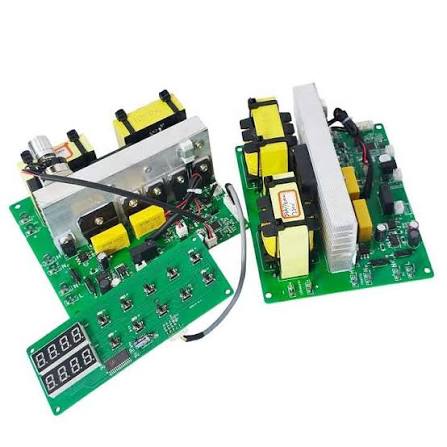
ultrasonic circuit board
How Ultrasonic Cavitation Cleans Hidden Contaminants
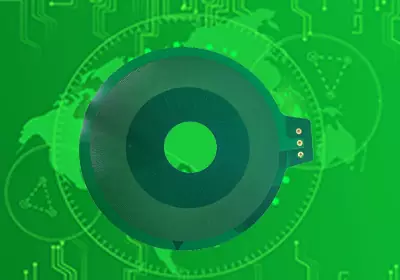
To understand why ultrasonic cleaning is so effective, you need to look at the physics happening inside the liquid tank. An ultrasonic circuit board cleaner utilizes high-frequency piezoelectric transducers attached to the bottom of a stainless-steel basin. These transducers vibrate rapidly, typically between 40 kHz and 80 kHz, sending high-frequency pressure waves pulsing through the cleaning liquid.
As these sound waves travel through the solvent, they create alternating high-pressure and low-pressure cycles. During the low-pressure cycles, millions of microscopic vacuum bubbles form in the liquid. When the subsequent high-pressure wave strikes, these cavitation bubbles collapse violently. The sudden collapse generates microscopic, high-energy liquid jets and localized temperatures that blast away stubborn flux, oil, and oxidation from the deepest, most inaccessible crevices beneath ball-grid array (BGA) chips and tight connector pins without damaging the physical copper traces.
Selecting the Right Cleaning Solution and Temperature
Simply filling your tank with plain tap water will not remove greasy rosin flux or heavy ionic contamination. Achieving professional results with an ultrasonic circuit board cleaner requires choosing the appropriate chemical solvent tailored to your specific cleaning task.
For general workshop repairs, deionized water mixed with a specialized, biodegradable saponifier or electronic-safe PCB cleaning concentrate works exceptionally well. If you are cleaning delicate vintage boards or sensitive analog radios, electronic-grade isopropyl alcohol (IPA) or specialized solvent blends are often preferred. Furthermore, most industrial units feature built-in heating elements. Maintaining a warm solution temperature between 40℃ and 60℃ dramatically lowers fluid surface tension and accelerates the chemical breakdown of baked-on soldering fluxes.
Step-by-Step Cleaning and Drying Procedures
Operating your ultrasonic circuit board cleaner safely requires a disciplined workflow to prevent accidental water damage to active components or sensitive mechanical parts.
---Pre-Inspection and Disassembly: Remove all coin-cell batteries, mechanical hard drives, paper product labels, and rubber gaskets that could be ruined by liquid immersion. If the board features electromechanical relays, microphones, or open-coil buzzers, mask them off or keep them elevated above the water line.
---The Cleaning Cycle: Suspend the circuit board inside the stainless-steel basket using nylon ties or a fixture, ensuring the board never rests directly against the vibrating bottom of the tank. Run a 5-to-10-minute cleaning cycle.
---Rinsing and De-watering: Once the cycle finishes, rinse the board immediately in clean deionized water or fresh alcohol to flush away suspended flux particles before they can resettle onto the dry surfaces.
---Thermal Drying: Never power on a damp circuit board. Place the rinsed assembly in a convection drying oven or component dehydrator at 60℃ for at least 30 to 45 minutes to drive out 100% of trapped moisture from beneath component packages.
Avoiding Common PCB Damage and Safety Pitfalls
While ultrasonic cleaning technology is remarkably powerful, improper operation can inadvertently damage delicate electronic assemblies.
One of the most frequent beginner mistakes is dropping circuit boards directly onto the bare metal floor of the wash tank. The intense ultrasonic vibration creates localized friction points that can fracture fragile ceramic capacitors or chip packages. Always use a suspended mesh basket. Additionally, avoid running high-power ultrasonic cycles on modern smartphones or action cameras containing delicate micro-machined (MEMS) sensors, as extreme acoustic vibrations can physically shatter internal optical image stabilization (OIS) gyroscopes. Knowing the physical limits of your hardware ensures safe, effective maintenance every single time.
Conclusion
Maintaining clean, contaminant-free circuit assemblies is a vital standard for anyone serious about professional electronics repair or reliable hardware manufacturing. Hand-scrubbing with cotton swabs and surface sprays can only remove surface grime, leaving hidden flux residues trapped beneath modern components to cause silent corrosion over time. By harnessing high-frequency acoustic cavitation, choosing the correct chemical solvents, and enforcing rigorous thermal drying protocols, an industrial-grade ultrasonic circuit board cleaner delivers unmatched deep-cleaning power. Investing in proper cleaning equipment guarantees that your electronic repairs are chemically pristine, electrically stable, and built to withstand years of demanding field operations.